1. Materials and Tools Needed
- Wire:
- 18-gauge wire for the base frame (strong enough to hold the shape).
- 24 or 26-gauge wire for weaving and decorative details.
- Centerpiece: A mother-of-pearl or any round shell piece measuring approximately 1-1.5 inches in diameter.
- Cord: A braided leather cord or chain to complement the pendant.
- Tools:
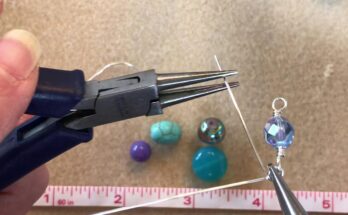
- Round-nose pliers (for creating loops and curves).
- Chain-nose pliers (for gripping and adjusting wire).
- Wire cutters (for cutting wires cleanly).
- Nylon jaw pliers (optional, for straightening wires).
- Mandrel or cylindrical object (to shape the circular base).
2. Creating the Base Frame
- Step 2.1: Cut an 18-gauge wire piece, about 8-10 inches long.
- Step 2.2: Use a mandrel or any circular object (such as a marker or dowel) to form a perfect circle slightly larger than the diameter of the shell piece.
- Step 2.3: Overlap the ends of the wire slightly, and twist them together to secure the circular shape. Trim any excess wire, leaving about 0.5 inches to form a decorative spiral or hook later.
3. Securing the Shell Centerpiece
- Step 3.1: Place the shell at the center of the circular frame.
- Step 3.2: Cut a piece of 24-gauge wire, approximately 12-15 inches long.
- Step 3.3: Start wrapping the 24-gauge wire around the shell and frame, weaving the shell tightly into the circle. Ensure the shell is snug and doesn’t wobble.
- Step 3.4: Add extra wraps in areas where the shell might be more prone to slipping out.
4. Decorative Weaving and Spirals
- Step 4.1: Use the 24-gauge wire to create a decorative weave along the circular frame. A figure-eight weaving pattern works beautifully.
- Step 4.2: Form spirals and curves using the excess 18-gauge wire from Step 2.3. Create elegant loops and curls by wrapping the wire ends around your round-nose pliers.
- Step 4.3: Add more decorative details around the frame using small wire spirals or additional loops, depending on your design preference.
5. Adding the Pendant Bail
- Step 5.1: Cut an 18-gauge wire piece, about 3 inches long.
- Step 5.2: Form a loop at the top of the pendant frame to act as the bail. Use round-nose pliers to create a loop, then wrap the remaining wire around the base of the loop for added strength.
- Step 5.3: Ensure the bail is wide enough to accommodate your braided leather cord or chain.
6. Attaching the Cord
- Step 6.1: Select a braided leather cord that matches the pendant’s aesthetic.
- Step 6.2: Cut the cord to your desired length (typically 18-22 inches for a necklace).
- Step 6.3: Attach the pendant to the cord by sliding the bail through the cord. Add clasps or closures to the ends of the cord for easy wear.
7. Finishing Touches
- Step 7.1: Use chain-nose pliers to smooth any sharp edges on the wires.
- Step 7.2: Polish the wire with a jewelry polishing cloth to enhance its shine.
- Step 7.3: Inspect the pendant to ensure all components are secure and there are no loose wires.
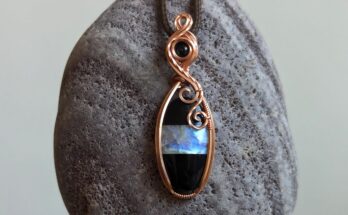
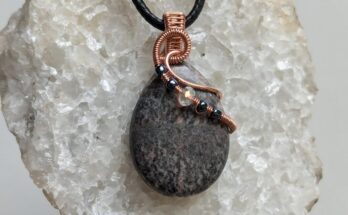
The Radiant Swirl Pendant combines timeless elegance with intricate craftsmanship, making it a perfect accessory or gift. The luminous mother-of-pearl centerpiece, framed by graceful copper spirals and weaves, highlights the artisan’s attention to detail. Whether paired with a casual outfit or formal attire, this pendant is sure to draw compliments!
#HandmadeJewelry #WireWrappingTutorial #CopperJewelry #ArtisanCrafts #MotherOfPearl


