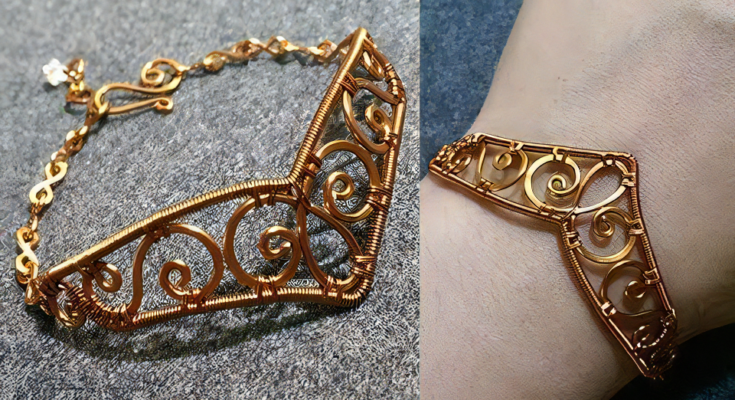
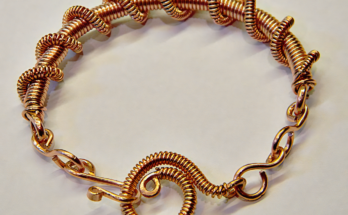
This stunning wire-wrapped bracelet features an elegant geometric design with flowing spirals, giving it an artisanal and timeless appeal. Below is a step-by-step guide to create a similar bracelet:
Materials Needed:
- Wire:
- 16- or 18-gauge wire for the main frame.
- 24- or 26-gauge wire for weaving and detailing.
- Tools:
- Round-nose pliers.
- Flat-nose pliers.
- Wire cutters.
- Mandrel or cylindrical object for shaping the bracelet.
- Optional:
- Patina solution for an antique finish.
- Polishing cloth.
Step-by-Step Instructions:
Step 1: Create the Frame
- Design the Base:
- Cut a piece of 16- or 18-gauge wire to form the bracelet’s triangular shape. Leave extra wire on both ends to create attachment loops.
- Form Attachment Loops:
- At both ends of the frame, use round-nose pliers to create small loops that will later connect to the chain or clasp.
Step 2: Add Spiral Accents
- Create Individual Spirals:
- Cut smaller pieces of 16- or 18-gauge wire.
- Using round-nose pliers, curl the ends of each wire into spirals of various sizes.
- Attach the spirals to the main frame by wrapping them with 24- or 26-gauge wire.
- Secure and Integrate:
- Use weaving wire to tightly secure the spirals to the triangular frame. Add decorative wraps for added texture.
Step 3: Weave the Wire
- Weaving Technique:
- Using 24- or 26-gauge wire, weave intricate patterns around the main frame and the spirals. This creates a cohesive design and adds strength to the bracelet.
- Check for Gaps:
- Ensure all components are tightly secured. Add additional wraps if necessary for a polished look.
Step 4: Shape the Bracelet
- Shape the Frame:
- Use a bracelet mandrel or cylindrical object to bend the wire frame into a cuff-like shape that fits the wrist comfortably.
- Adjust the Ends:
- Ensure the attachment loops align properly for the chain or clasp.
Step 5: Attach the Chain and Clasp
- Chain Connection:
- Attach a decorative chain to both loops at the ends of the bracelet.
- Add Clasp:
- Secure a clasp to one end of the chain.
Step 6: Finishing Touches
- Polish:
- Use a polishing cloth to make the bracelet shine.
- Optional Antiquing:
- Apply patina for an aged, vintage look, then polish the highlights for contrast.
This bracelet is a blend of geometric precision and organic elegance. Let me know if you need more details or guidance!
