Material requirements:
Outer fabric: approx. 31 cm x 17 cm
Inner fabric: approx. 31 cm x 17 cm
(possibly reinforcement for ironing on)
Bow: 13 cm x 17 cm
Knot: 7 cm x 12.5 cm
1 press stud
1. cut to size:
gray fabric: 1x piece each with cut flap, piece without flap, bow (like piece without flap + 1 cm all around, knot 7 x 12.5 cm
Drop fabric: 1x piece each with and without flap
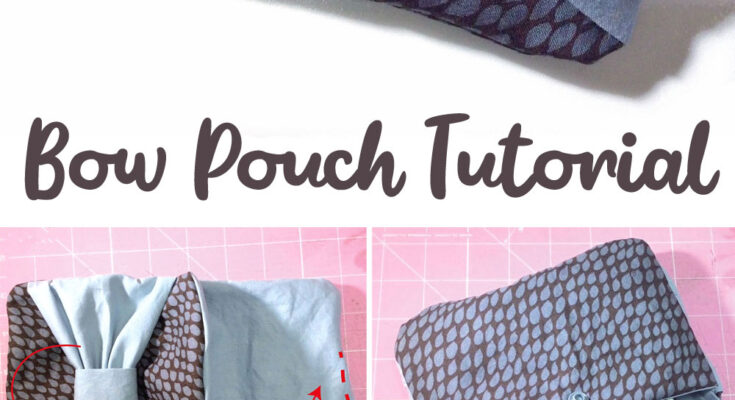
2. Fold the top and bottom edges of the bow over twice, press, if you wish you can also topstitch, but this is not essential. Sew the knot lengthwise and turn.
3. gather the bow in the middle. Fold in the knot on one side, place around the bow fabric, insert the other side into the open end of the folded side, sew in place by hand
4. pin the bow flush to the side of the drop fabric with flap and sew in place at the sides
5. lay fabrics right sides together: a) sew both fabrics without flaps together along the straight edge (without illustration), then b) lay the matching pieces with flaps right sides together, with the curves facing outwards, sew drop fabric to drop fabric and gray to gray, leaving out the flaps and leaving a turning opening in the gray fabric (lining).
6. now sew the flap: drop fabric on gray fabric, right sides together, then cut in all curves
7. turn, smooth out the edges, close the turning opening
8. push the gray fabric into the drop of fabric
9. attach the press stud, done!


